Independent fan wiki - Not affiliated with louidev

Wiki - Field Guide
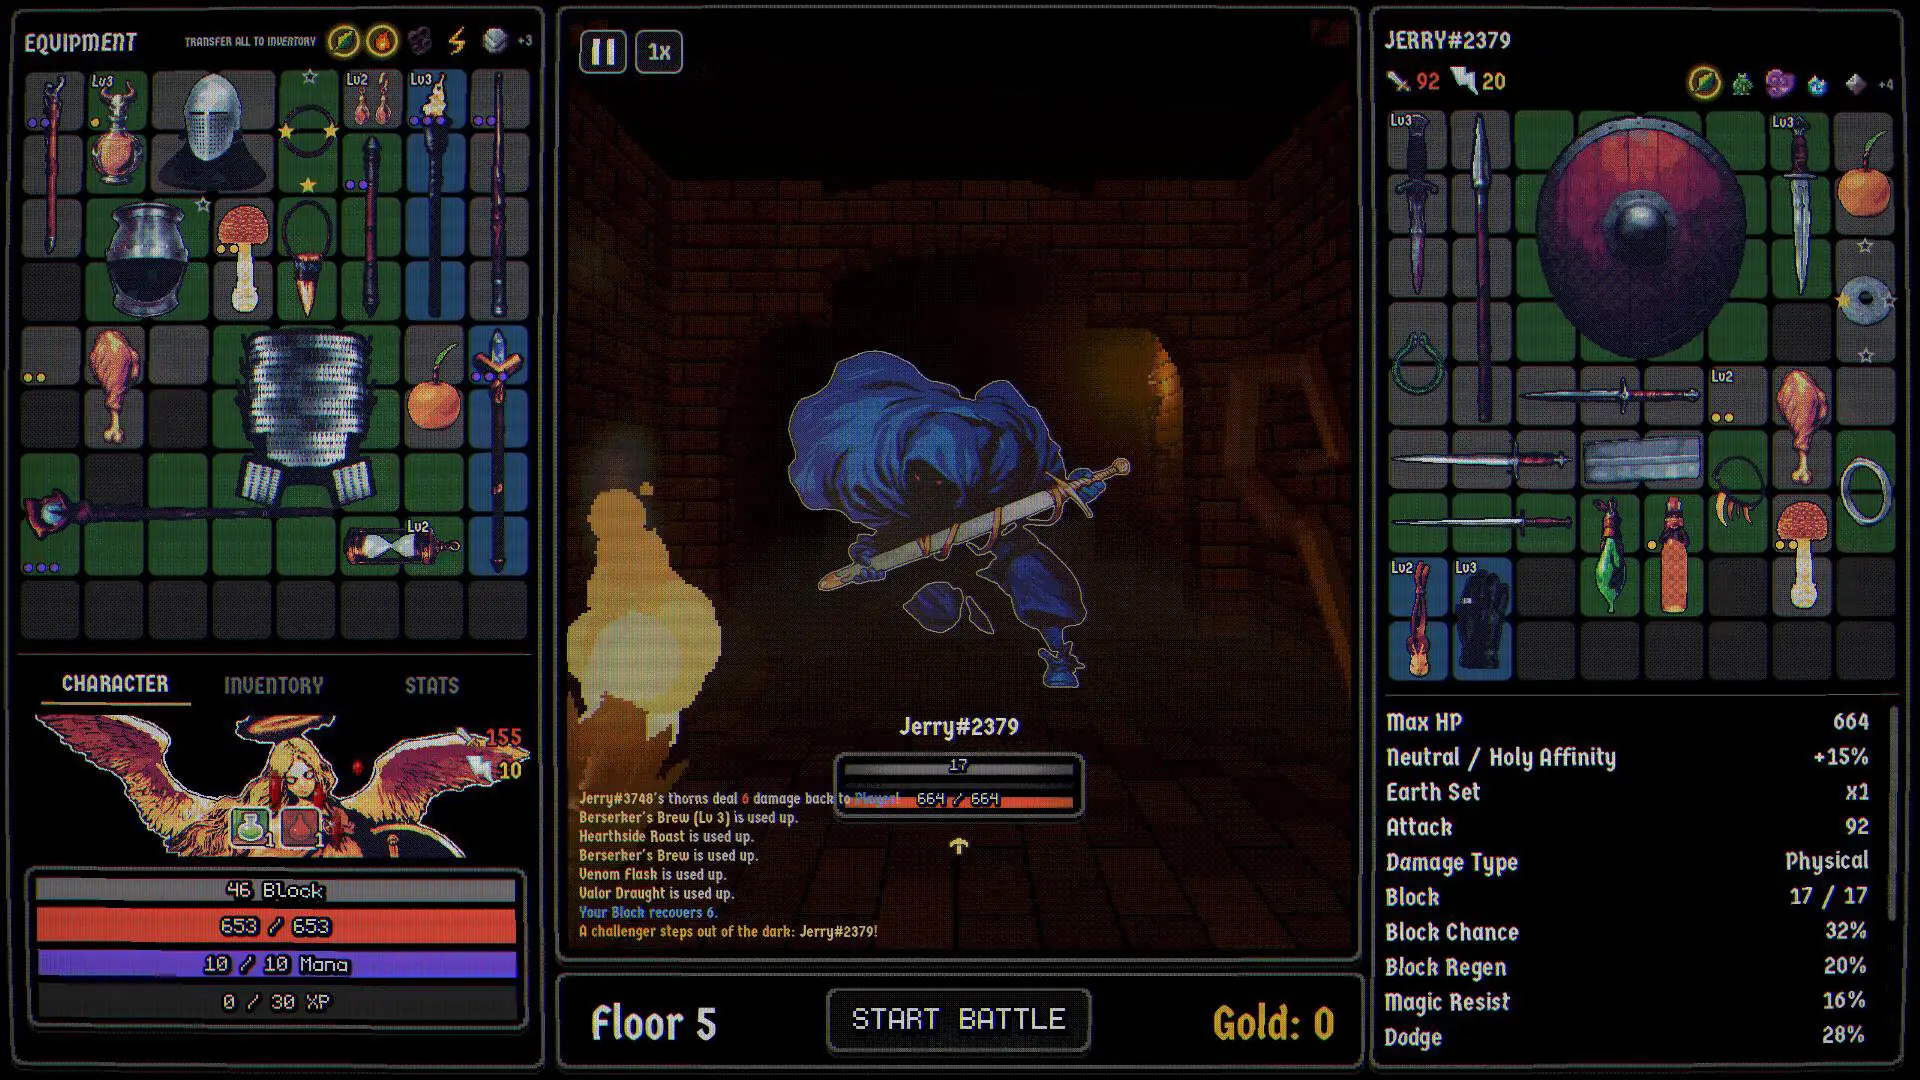
Dungeonbound equipment board and rival board side by side in a floor five fight

Builds & strategy

Builds without a fake tier list

Dungeonbound's balance changed repeatedly before launch. Instead of ranking heroes from mixed patches, here are three build frameworks, the confirmed mechanics behind each, and the failure mode you should test first.

Frameworks
3
Tier list
None
Last check
2026-11-15
Evidence
Official + press

Official Steam screenshot

Read this first

These are planning templates, not claims about the strongest launch build. The game does not publish win rates, and we do not invent them. Each framework names its confirmed basis and its natural counter.

Three frameworks

Pick a plan, then test the failure mode

Framework 01

Affinity stack

Choose a hero whose affinity tags you can actually shop for, then buy gear that shares those tags. Sets are tag counts, so every matching piece feeds the same multiplier.

Confirmed basis

Hero affinity +15% is visible on official panels; matching gear gains the bonus. Tag counts appear on the shop and rival screens.

Failure mode

A shop that refuses to offer your tag. Keep one off-tag sustain piece as a hedge.

Framework 02

Status pressure

Build around Burn, Poison or Bleed, then survive long enough for the stacks to matter. The damage comes from the clock, not from one big hit.

Confirmed basis

Burn ticks every 1.5s; Poison every 3s. Burn wards block 50%. Statuses stack and tick independently.

Failure mode

Cleanse, wards and Unhealing. If your only plan is one DoT, a single ward answers it.

Framework 03

Attrition / Thorns

Block the hit, heal it back, and let Thorns punish attackers. The Paladin's official identity is the clearest example: "the sturdiest start, with the most Block...a tree of healing and Thorns."

Confirmed basis

Paladin description; Thorns reflects damage; Fatigue starts at 60s; Unhealing reduces healing.

Failure mode

Burst that exceeds the block pool, Unhealing, and fights that out-scale your damage before fatigue.

The six-question board checklist

01

What is the anchor?

Name the item or tag the board is built around. If you cannot, you have a pile.

02

What recovers health?

Block is not sustain. Point at the piece that gets HP back.

03

What covers the rune?

A 2x2 rune powers the item covering most of it. Do not waste it on filler.

04

What is the damage type?

Physical or magic. Check the rival before assuming your type is fine.

05

What is the failure mode?

Thorns, Unhealing, Burn wards, high Dodge, Fatigue. Pick one and test it.

06

What is the next upgrade?

Leave a merge lane or a shop slot open for the answer you already know you need.

Test one variable at a time

The battle log is the only reliable feedback channel. It names the item that triggered, the status it applied and the damage event. Use it like a lab notebook:

  1. Write the hypothesis. "A Leech Tooth will keep the Paladin above 50% through floor 4."
  2. Change one thing. One relic, one item, one placement. Not all three.
  3. Run the next fight. Read the top damage and healing sources before the next shop.
  4. Record the result. The Climb tracker has a notes field for exactly this.
  5. Repeat three times. One fight is noise; three fights with the same variable is a pattern.

Scout the rival before the build

In The Climb, the rival panel is a free stat sheet. Check the damage type, Block, Block Regen, Dodge, Crit and set counts before you spend the last of your gold. A build that beats the floor's regular enemies can still lose to a rival with a stacked set and a damage type your defence does not cover. The Climb guide has the full scouting order.

What we will not publish

  • A ranked list of heroes from mixed pre-release patches.
  • "Best-in-slot...boards without a verified full item list.
  • Win-rate percentages or player counts we cannot source.
  • A build generator that ignores the shop you actually got.

When the launch build has enough verified data, this page will add tested board examples with patch numbers and source labels. Until then, the frameworks and the checklist are the honest version.

Sources & verification

Checked 2026-11-15
  1. 01
    Dungeonbound on Steam Official Store description, feature list, modes, system requirements, languages and release date.
  2. 02
    Dungeonbound v0.1.40 Update + Mac Build for demo Official The Grave, speed baseline, item balance, climb win condition, Mac demo build.
  3. 03
    Dungeonbound 0.1.46: Halloween Update Official Pumpkin Head, Haunted items, co-op lobbies, Mythic relics, PvE-only climbs, status changes.
  4. 04
    Dungeonbound v0.1.50: Potions, Runes & Late Game + 40k wishlists Official Rune rework, potion rules, new hero Jeiku, forged-item growth, fatigue, speed curve.
  5. 05
    Dungeonbound v0.1.51 + 55k wishlists + 7 days until launch Official Pricing indication ($10-12), item shrines, fusion preview, Loaded Dice, Jeiku, QoL and fixes.
  6. 06
    Dungeonbound Review: The Bag Does the Fighting Press Pre-release impressions of the demo, including affinity tooltips, tag sets, fusion space savings and fatigue.
  7. 07
    Official Steam store screenshot: rival scout panel Official screenshot Rival board, affinity, set counts, block, dodge, crit and floor edge stats.
  8. 08
    Official Steam store screenshot: Unranked Climb roster and Flame Knight panel Official screenshot Roster names, Flame Knight stats, type bans, and the "stats vary by up to 15%" note.

Screenshots and patch notes reflect pre-release builds. Where the launch build differs, the source label tells you how much weight to give a claim.

Quick answers

Build FAQ

Does Dungeonbound have a tier list? +

We do not publish one. The game changed Speed, potions, runes, Stun, Burn, Poison, Fatigue and multiple heroes between v0.1.40 and v0.1.51. A ranking assembled from different patches would not be comparable, and no full-release dataset exists yet.

What is the best build in Dungeonbound? +

There is no verified best build. A board is strong relative to the floor, the rival and the shop you actually saw. The three frameworks on this page are planning templates, not rankings.

Should I stack one tag or mix two? +

Stacking one tag concentrates the affinity and set bonuses, but it also concentrates the shop risk: if the pool does not offer that tag, the board stalls. A second tag is a hedge. The right answer depends on how many floors you need to survive.

How do I test a build without wasting a run? +

Change one thing at a time, run the next fight, and read the battle log for the top damage and healing source. Record the result in the Climb tracker. Three runs with one variable is more useful than ten runs with five changes.